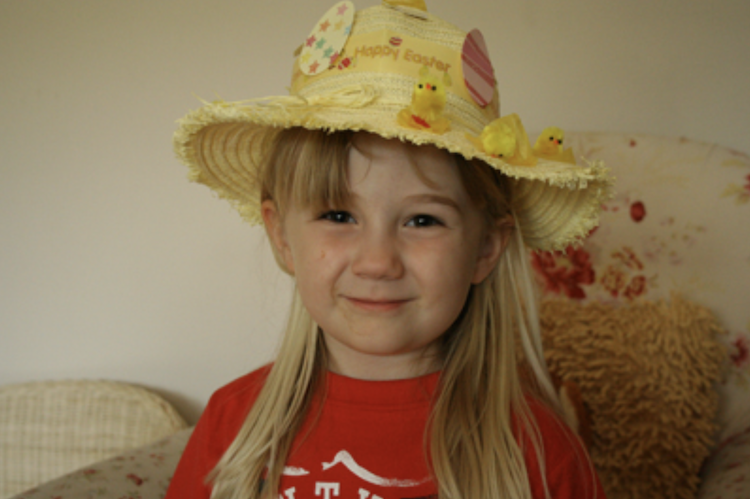
You never know when you might need to know how to make an Easter Bonnet. That’s what I’ve learned this weekend.
I love Sundays, don’t you? Lazy afternoons made for leisure and relaxation. This weekend we had a family dinner at my parents’ house and stuffed ourselves with my Mum’s excellent cooking. We were just considering going for a walk (or having a nap) when I had one of those heart-in-your-boots moments.
“Oh, feck it. Flea needs to make an Easter bonnet for tomorrow.”
This was swiftly followed by:
“I have no idea how to make an Easter bonnet.”
And:
“What’s an Easter bonnet anyway?”
Seriously, what is it with schools today? Do they think I have nothing better to do on a Sunday afternoon than to wrestle with pipe cleaners and Pritt Sticks?
As it turns out my former sister-in-law loves crafts. She nipped to a shop for me and bought an Easter Bonnet Making kit. Flea and I took the kit home and now I can share with you step by step instructions that are incredibly simple to make your own bonnet for Easter.
How to make an Easter Bonnet: Step by Step
Step 1:
To begin with, find a bonnet that fits on your child’s head. Argue for 20 minutes about which is the front and which is the back. Decide to give in with good grace, since it makes your child happy to wear it back to front.
Step 2:
Take the pretty decorated eggs from the package and fix them to your bonnet using the sticky squares provided. Get sticky squares stuck to your fingers instead. Tear sticky square in half trying to remove from finger. Decide to use Pritt stick instead before learning that a Pritt Stick has the worst name in history because it singularly fails to make anything stick together EVER. Put wobbly eggs onto hat and reassure child with something like, “It’ll be much less wobbly when it dries.”
Step 3:
Wrap ribbon around brim of hat to create lovely, decorative Easter feature. Ask child to cut ribbon in appropriate place. Realise this was a bad idea and your ribbon is now half an inch short. Calm down hysterical child who is weeping, “It doesn’t look right, it’s RUBBISH.” Attempt to somehow stretch ribbon, in fact causing the ribbon to tear down the middle and start to split along its full length. Give up and patch the whole thing with several yards of Sellotape.
Step 4:
Decide to place Easter chicks in jaunty position around brim of bonnet. Realise glue is pointless in attempting to stick chicks to wicker-type material and opt for staples. After staple-related injury, come up with GENIUS idea of sticking tissue-paper ‘straw bales’ to the hat and then sticking the chicks to the straw. No, I don’t know if chicks live on straw bales, but it seemed like a good idea at the time, okay? Except it turns out tissue paper falls apart at the slightest human contact. And if it is coated with glue, it will then attach itself permanently to your clothing, table cloth, floorboars and any surface within 25 yards.
Step 5:
Having constructed straw bales, glue chicks to the tissue paper. Accidentally decapitate two chicks during the sticking process. Remove legs of another chick. Convince child that nine is more than enough chicks for any bonnet.
Step 6:
After two hours, six paper cuts, two decapitations, one severing of limbs, two inappropriate uses of profanity and tears on both sides, you too can feel proud of this, erm, Easter Bonnet creation:
I think you’ll agree, it could have been a lot worse. And now you know how to make an Easter Bonnet for your child. Can’t promise it’ll be as good as mine, obviously.


Pingback: Simple DIY Easter Hat Ideas to Make with Kids